SHT31 Arduino Tutorial: Wiring, I²C Code and Serial Monitor,Can NYFEA FHT31 replace SHT31?
Connect an SHT31 breakout to Arduino Uno over I²C, upload an address-aware sketch, and reject invalid readings before using temperature or relative humidity data.The SHT3X is Sensirion’s mid-to-high accuracy temperature and humidity sensor series — covering SHT30 (good), SHT31 (better), and SHT35 (best). All three share the same I2C command set, the same pinout, and the same conversion formulas
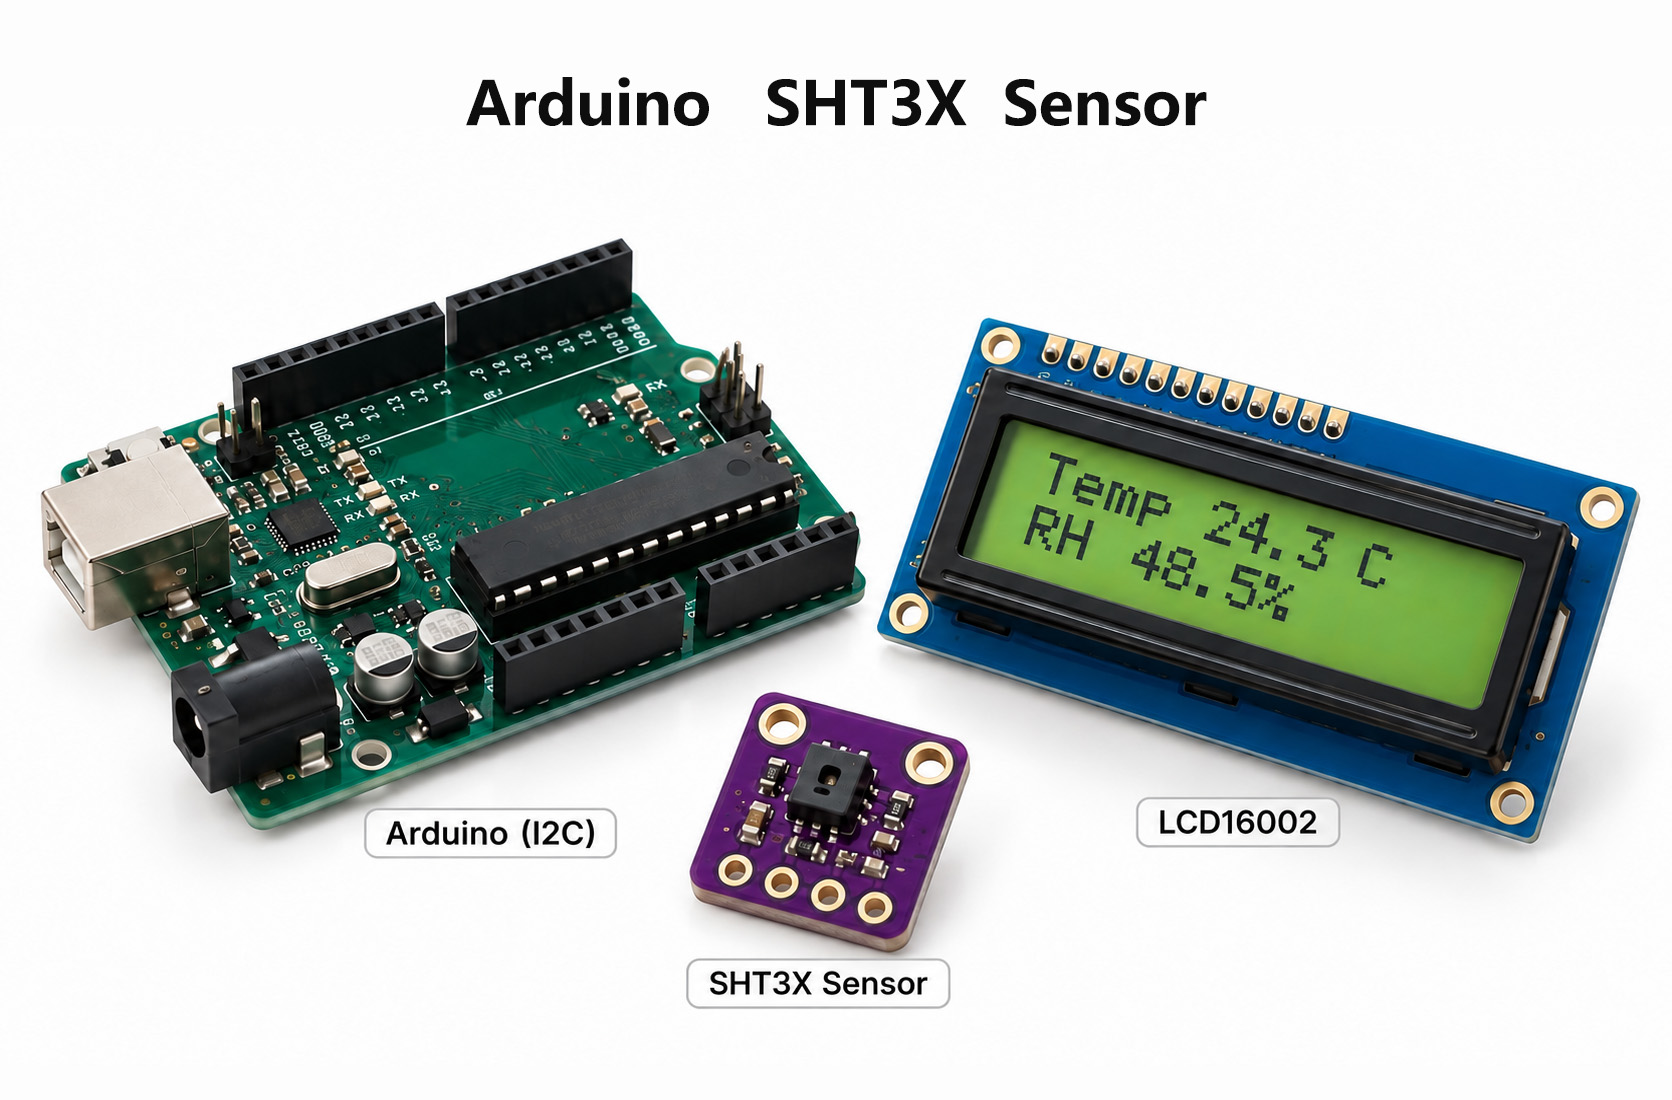
Direct answer. Connect an SHT31 breakout to Arduino Uno with VCC to a supported supply, GND to GND, SDA to A4 and SCL to A5. Install the Adafruit SHT31 library, initialize address 0x44 or the board-configured 0x45, upload the sketch, set Serial Monitor to 9600 baud, and accept a sample only when both measurements are finite and the status is ok.
1. How do you wire an SHT31 to Arduino Uno?
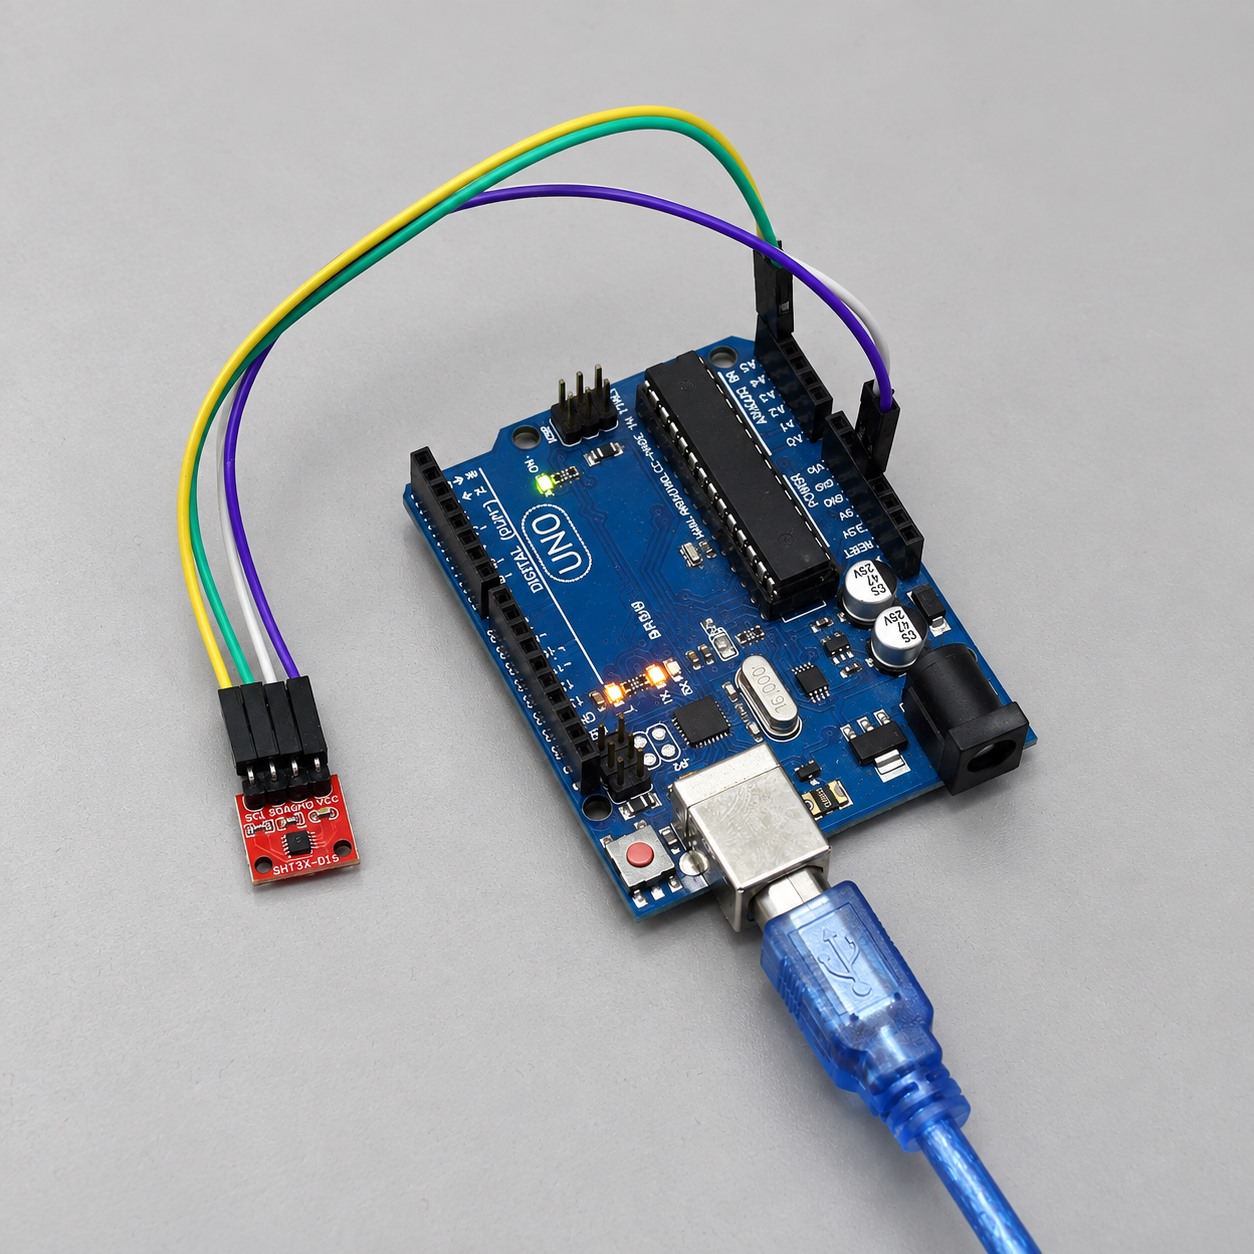
An SHT31 breakout needs four Arduino Uno connections: supply, ground, SDA and SCL. Use A4 for SDA and A5 for SCL on an Uno R3, but verify the actual breakout supply rating because a module may add a regulator, level shifting or pull-up resistors that a bare SHT31 does not include.
Hardware checklist
- Arduino Uno R3 and a data-capable USB cable
- SHT31 temperature-and-humidity breakout board
- Four jumper wires that match the headers fitted to the breakout
- Breadboard, if the module cannot be connected securely without one
- A computer with Arduino IDE installed
An external 9 V adapter is unnecessary for this USB-powered bench setup. Do not power the Uno from multiple sources unless the intended power arrangement has been checked.
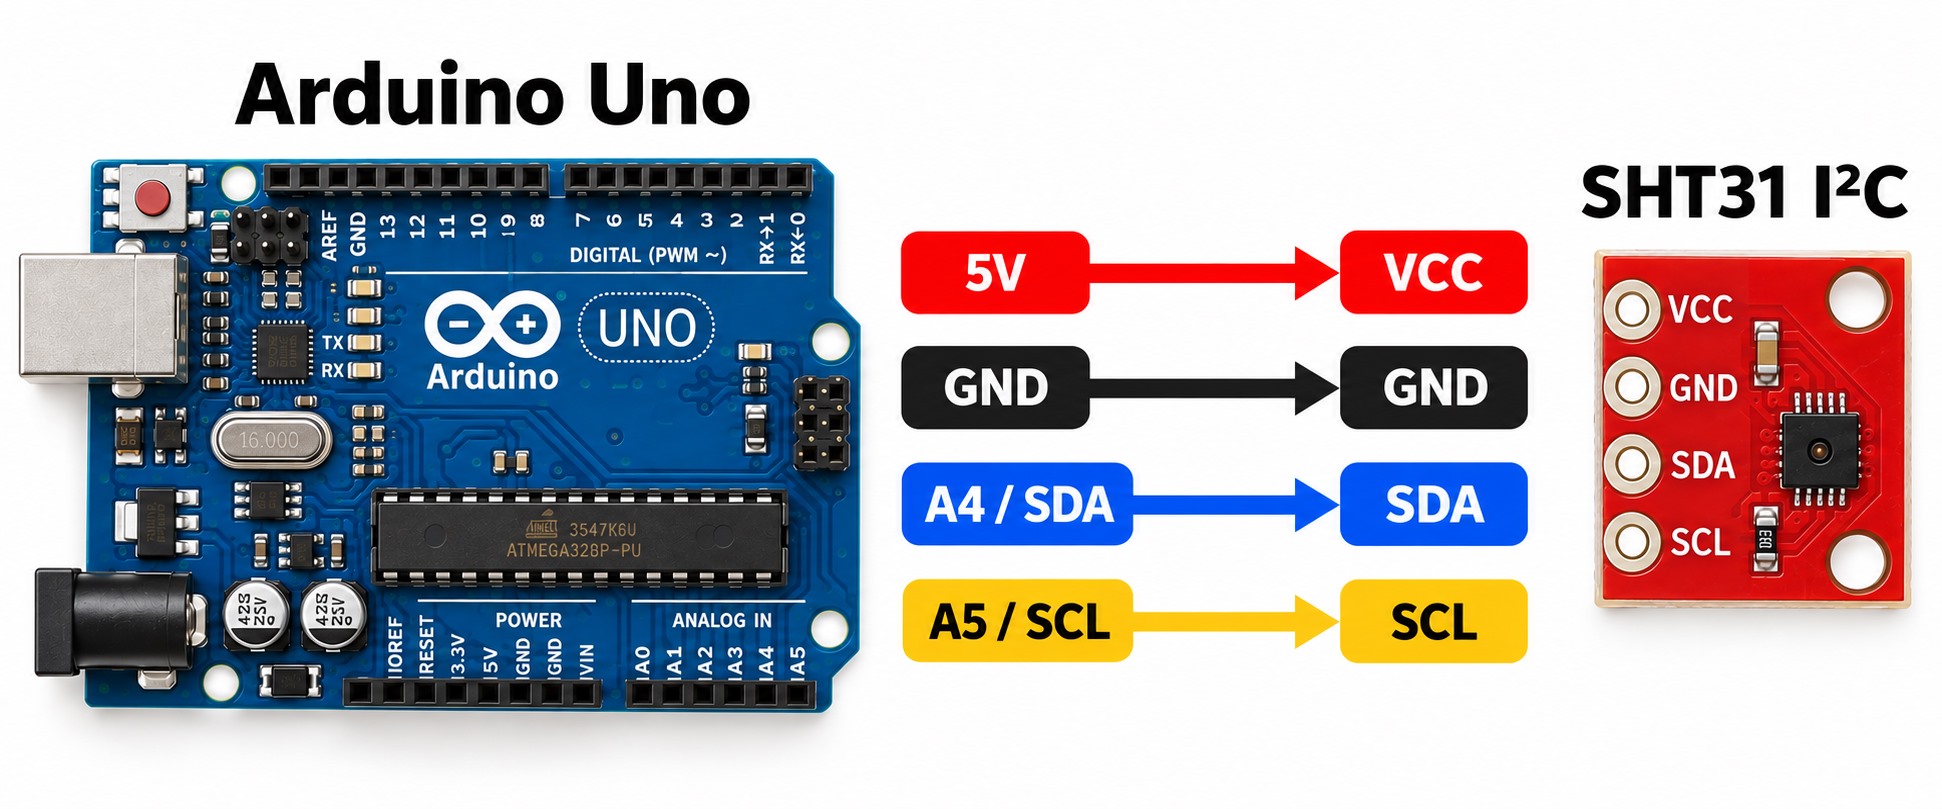
| Arduino Uno | Typical breakout pin | Required check |
|---|---|---|
| 5 V or 3.3 V | VCC / VIN | Use only the voltage stated for this breakout board |
| GND | GND | Common ground return |
| A4 | SDA | Data line is not swapped |
| A5 | SCL | Clock line is not swapped |
Board-specific warning: A4 and A5 are the Uno’s I²C pins. Other Arduino boards can place SDA and SCL elsewhere. Follow the pin labels or the official pinout for the board actually being used.
2. Which Arduino library should you install for SHT31?
Use the Adafruit SHT31 library for the sketches in this guide. Install it with Arduino Library Manager when available; manual installation also works when the extracted Adafruit_SHT31 folder contains the library files directly.
- Open Tools → Manage Libraries.
- Search for Adafruit SHT31.
- Install the library and its requested dependencies.
- Restart Arduino IDE if the header cannot be found after installation.
Manual installation: extract the downloaded archive, copy its library folder into Documents/Arduino/libraries, and restart Arduino IDE. The folder should contain the library files directly; an extra nested archive folder can prevent Adafruit_SHT31.h from being found. Library Manager is preferable when available because it also resolves dependencies.
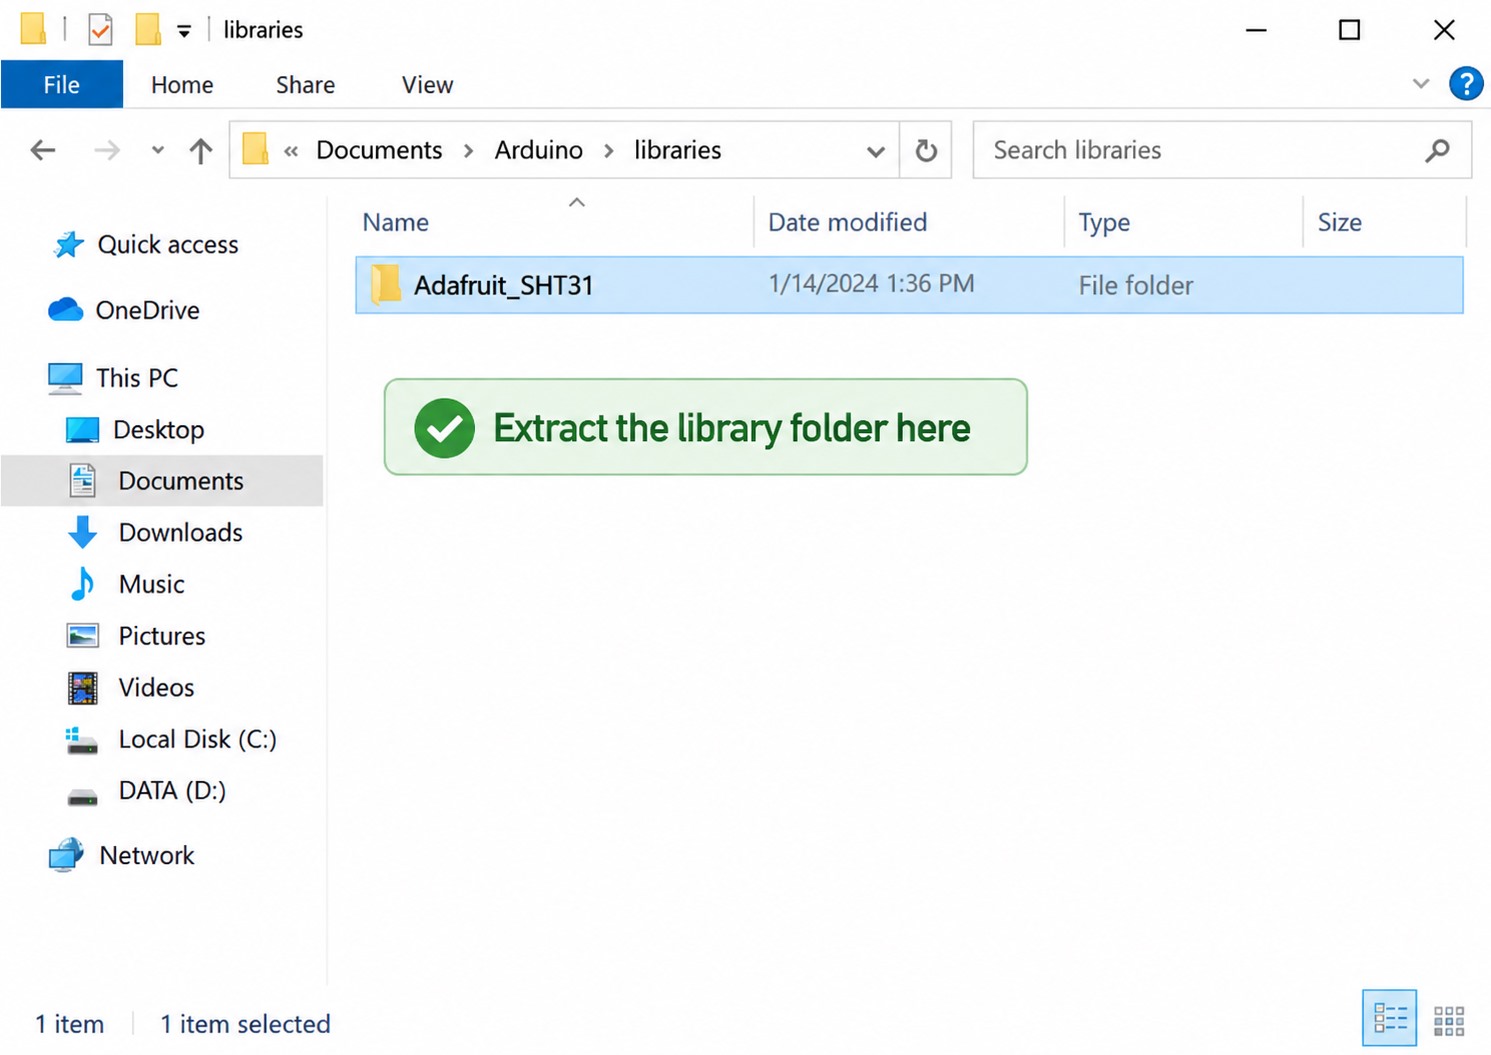
Adafruit_SHT31 folder into Documents/Arduino/libraries. Do not leave only the compressed archive in this folder.3. How do you prepare Arduino IDE?
Prepare Arduino IDE by opening a new sketch and confirming that Wire.h and Adafruit_SHT31.h compile. Enter the complete sketch before choosing the board and serial port.
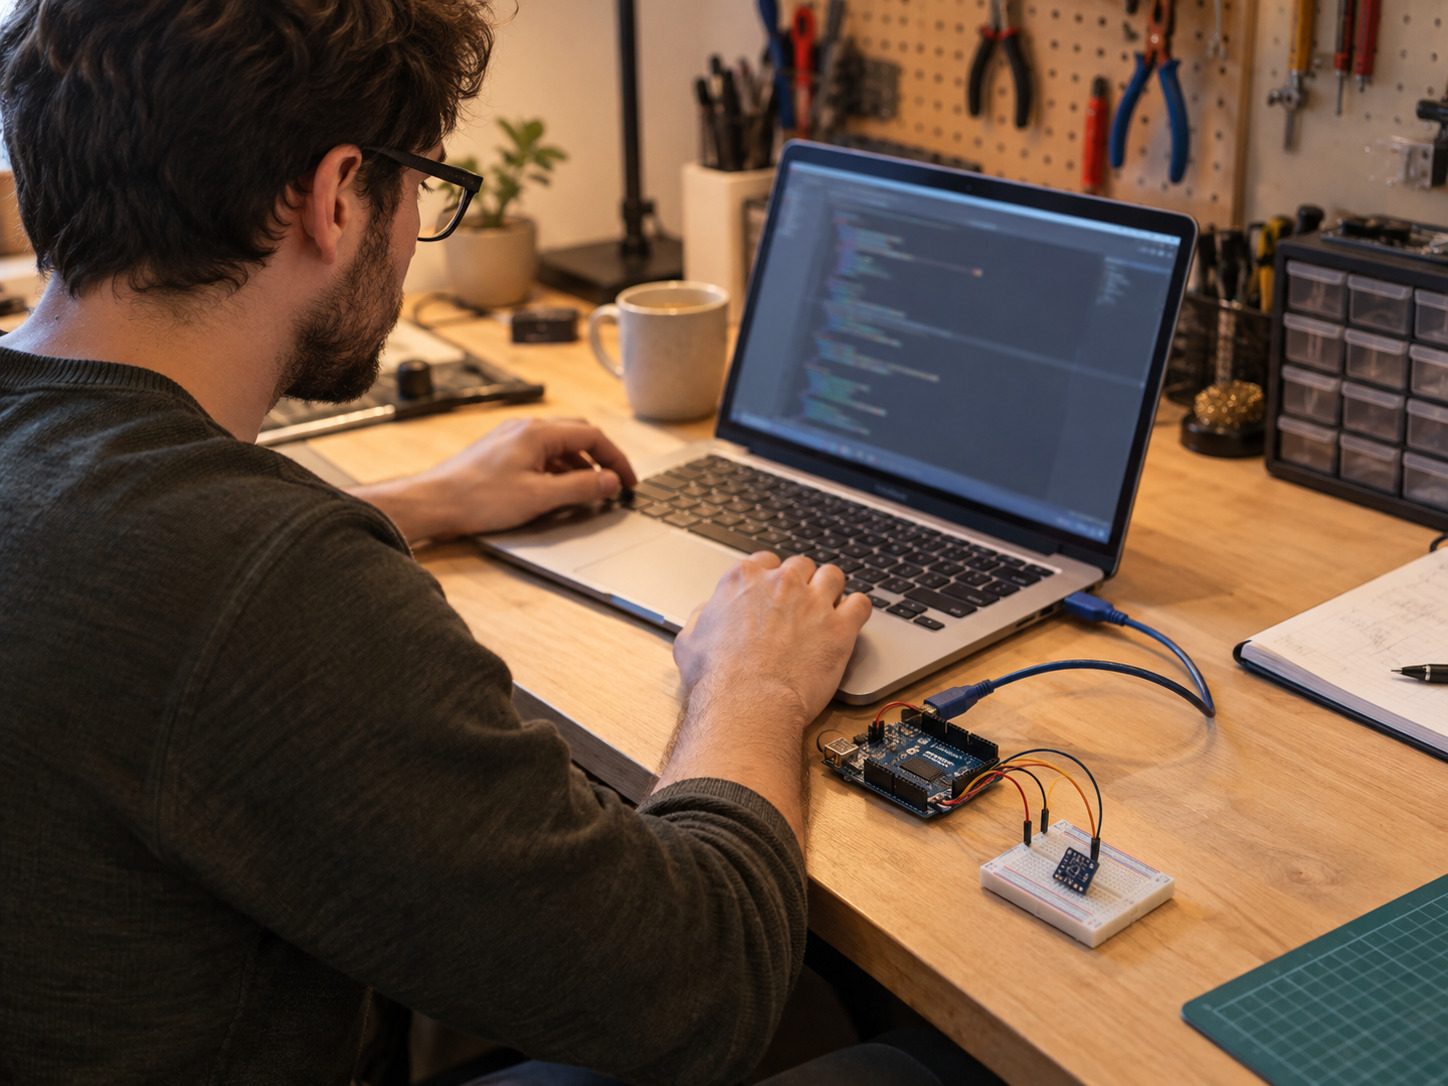
4. What SHT31 Arduino code should you use?
Use an SHT31 sketch that initializes the configured I²C address and rejects failed measurements. The reference version below uses 0x44; the diagnostic version checks both 0x44 and 0x45 and prints a machine-readable status field.
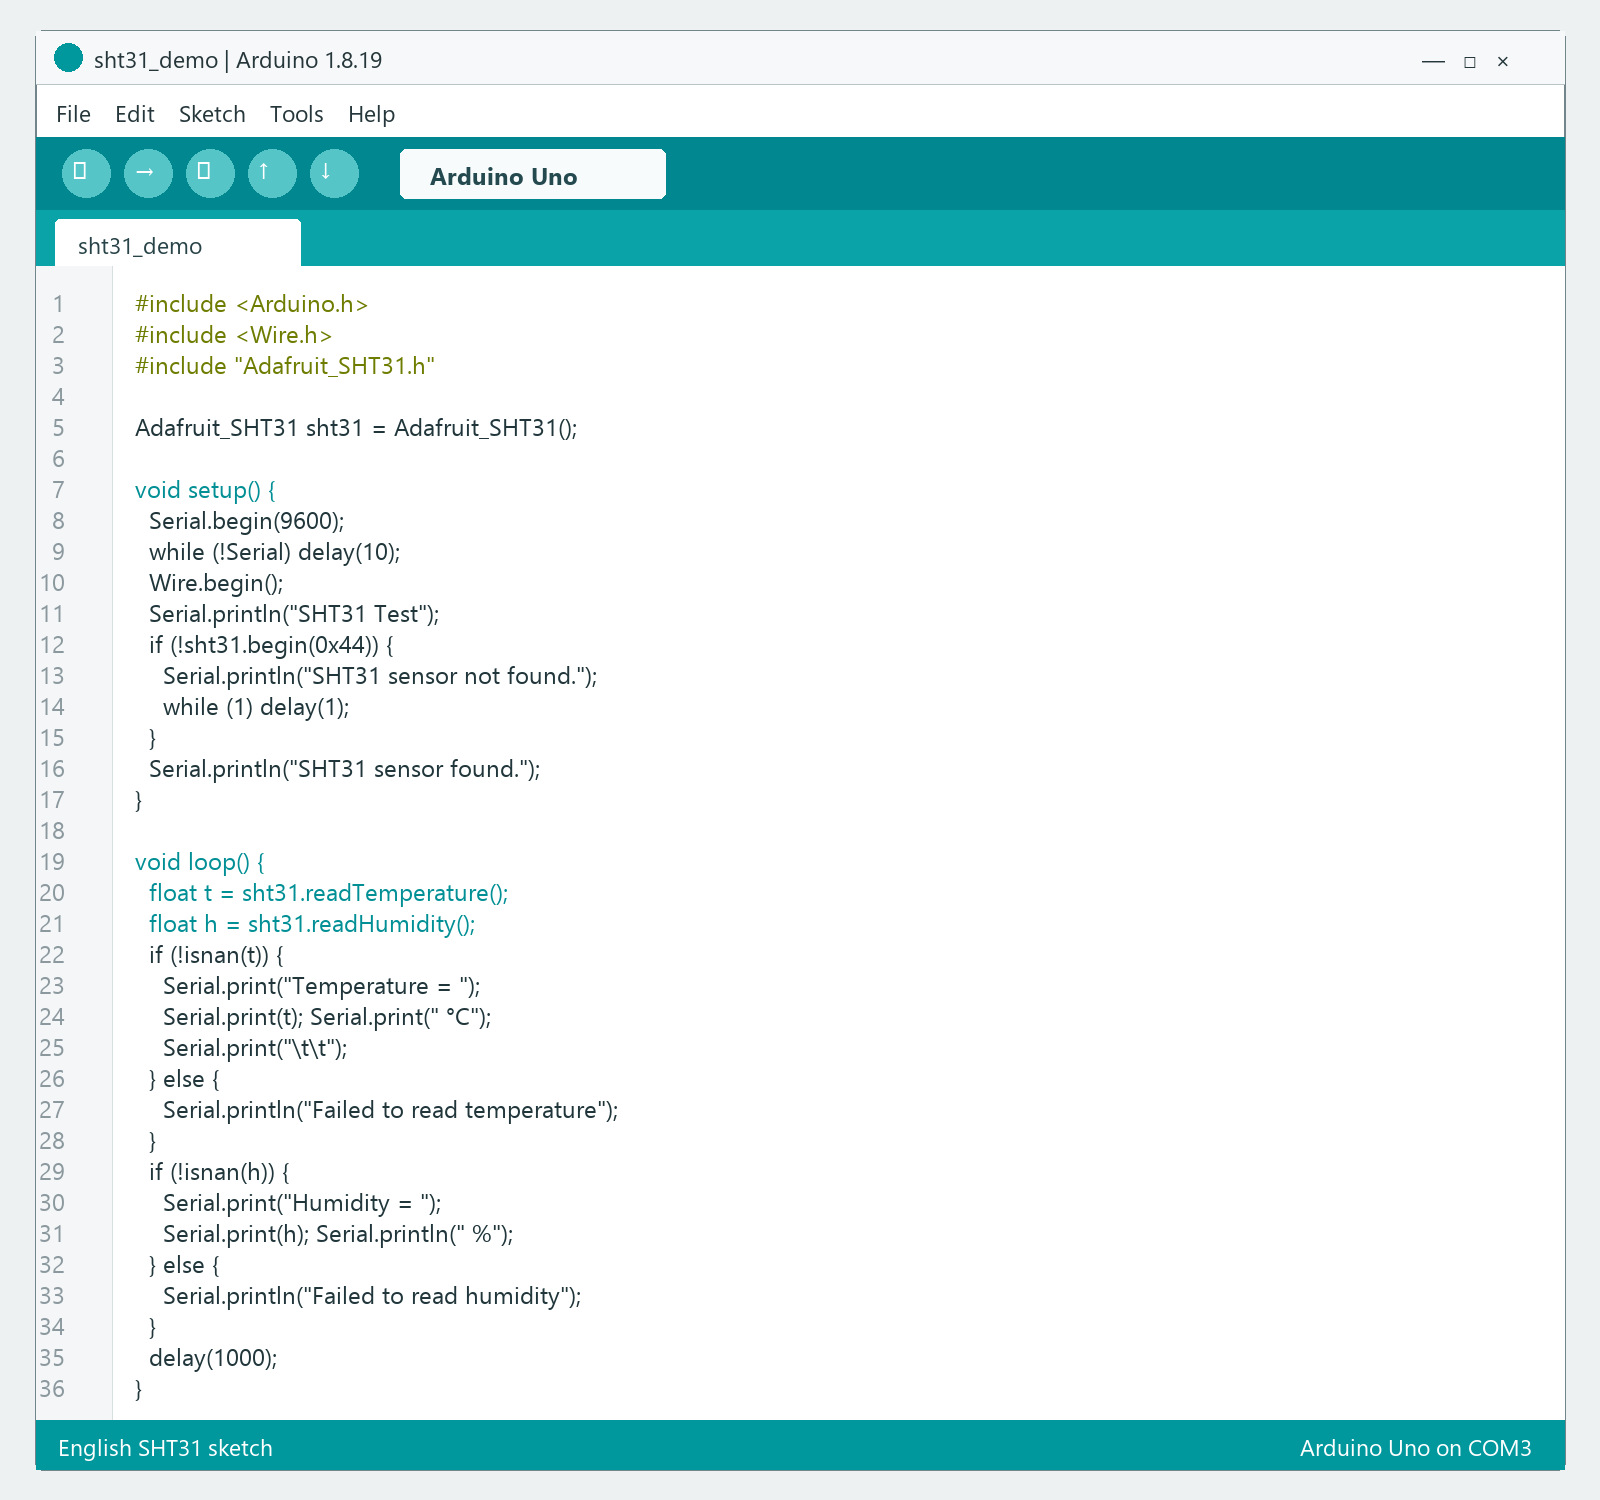
0x44, reads temperature and relative humidity, and prints the results at 9600 baud.English SHT31 sketch
#include <Arduino.h>
#include <Wire.h>
#include "Adafruit_SHT31.h"

Adafruit_SHT31 sht31 = Adafruit_SHT31();

void setup() {
  Serial.begin(9600);
  while (!Serial) delay(10);
  Wire.begin();
  Serial.println("SHT31 Test");
  if (!sht31.begin(0x44)) {
    Serial.println("SHT31 sensor not found. Check wiring and address.");
    while (1) delay(1);
  }
  Serial.println("SHT31 sensor found.");
}

void loop() {
  float t = sht31.readTemperature();
  float h = sht31.readHumidity();
  if (!isnan(t)) {
    Serial.print("Temperature = ");
    Serial.print(t); Serial.print(" °C");
    Serial.print("\t\t");
  } else {
    Serial.println("Failed to read temperature");
  }
  if (!isnan(h)) {
    Serial.print("Humidity = ");
    Serial.print(h); Serial.println(" %");
  } else {
    Serial.println("Failed to read humidity");
  }
  delay(1000);
}
Corrected diagnostic version for engineering bring-up
The following version uses consistent SHT31 naming, checks both standard SHT3x addresses and makes failed measurements visible.
#include <Wire.h>
#include <Adafruit_SHT31.h>

Adafruit_SHT31 sht31 = Adafruit_SHT31();
uint8_t sensorAddress = 0;
unsigned long sampleNumber = 0;

bool addressAcknowledges(uint8_t address) {
  Wire.beginTransmission(address);
  return Wire.endTransmission() == 0;
}

bool beginSHT31() {
  const uint8_t candidates[] = {0x44, 0x45};
  for (uint8_t address : candidates) {
    if (addressAcknowledges(address) && sht31.begin(address)) {
      sensorAddress = address;
      return true;
    }
  }
  return false;
}

void setup() {
  Serial.begin(9600);
  Wire.begin();
  delay(20);
  Serial.println(F("sample,ms,address,temperature_c,humidity_rh,status"));
  if (!beginSHT31()) {
    Serial.println(F("0,0,none,,,not_found"));
    while (true) delay(100);
  }
}

void loop() {
  float temperatureC = sht31.readTemperature();
  float humidityRH = sht31.readHumidity();
  sampleNumber++;
  Serial.print(sampleNumber); Serial.print(',');
  Serial.print(millis()); Serial.print(F(",0x"));
  Serial.print(sensorAddress, HEX); Serial.print(',');
  if (isnan(temperatureC) || isnan(humidityRH)) {
    Serial.println(F(",,read_failed"));
  } else {
    Serial.print(temperatureC, 2); Serial.print(',');
    Serial.print(humidityRH, 2); Serial.println(F(",ok"));
  }
  delay(1000);
}
5. How do you select the Arduino board and COM port?
Select Arduino Uno and the USB serial port that belongs to the connected board. If the port is unclear, compare the port list before and after reconnecting the Uno.
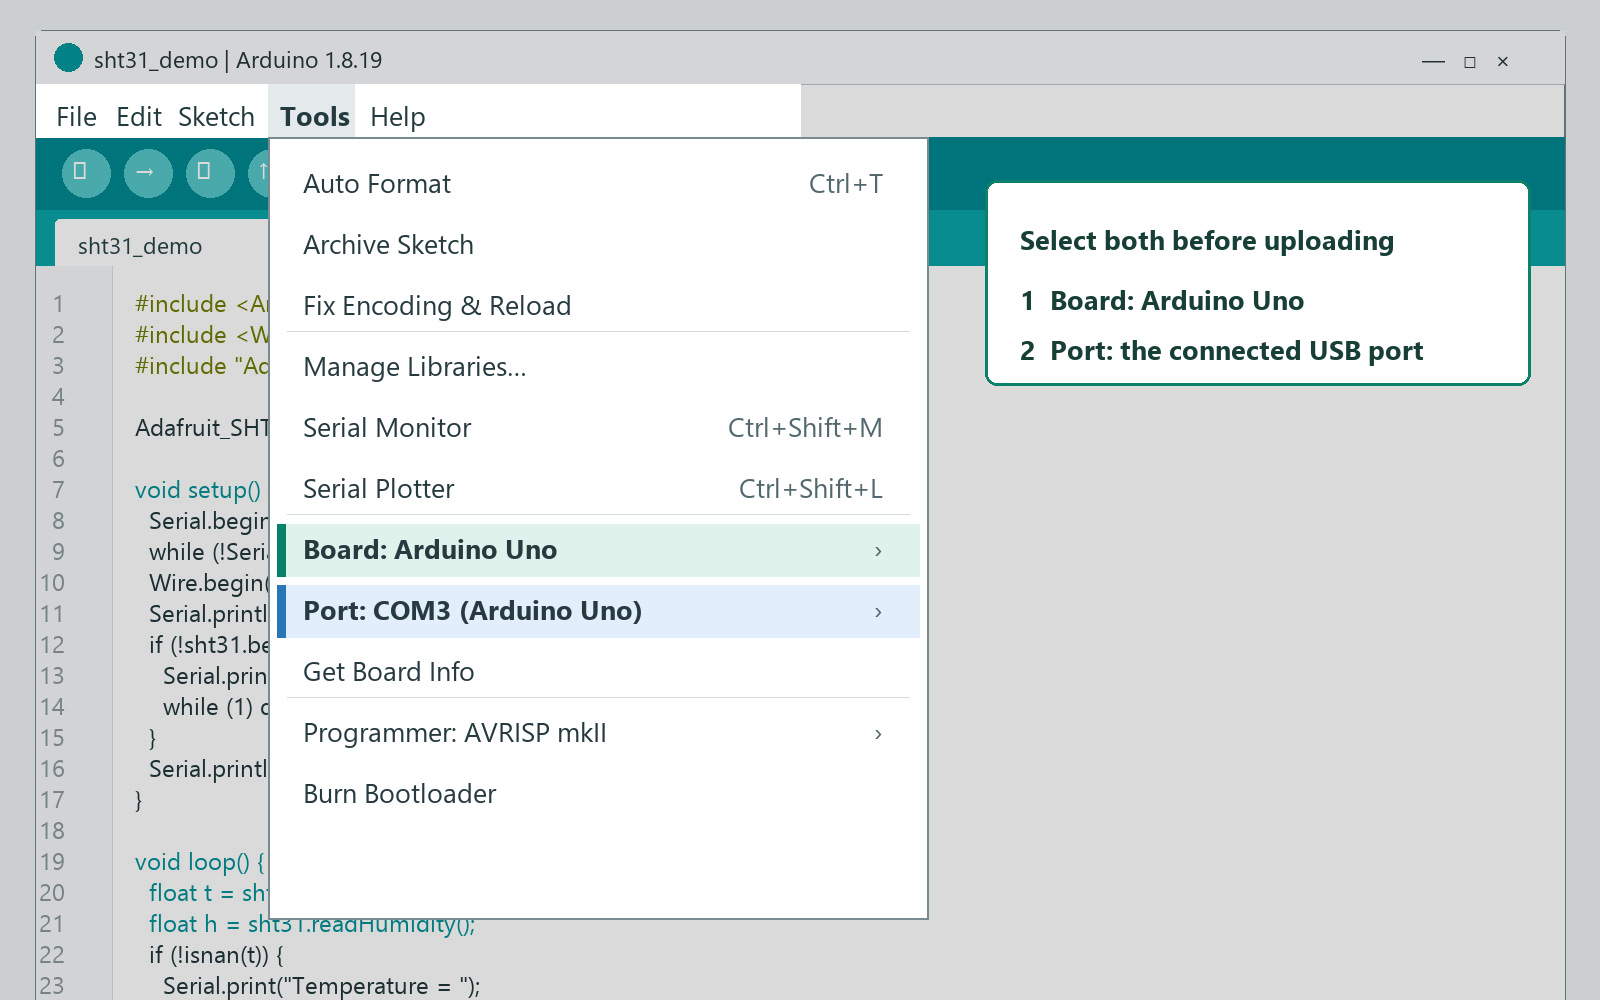
6. How do you upload and confirm the sketch?
A successful SHT31 upload ends with Done uploading in Arduino IDE. That message confirms the sketch reached the selected Uno; it does not confirm that the SHT31 answered over I²C.
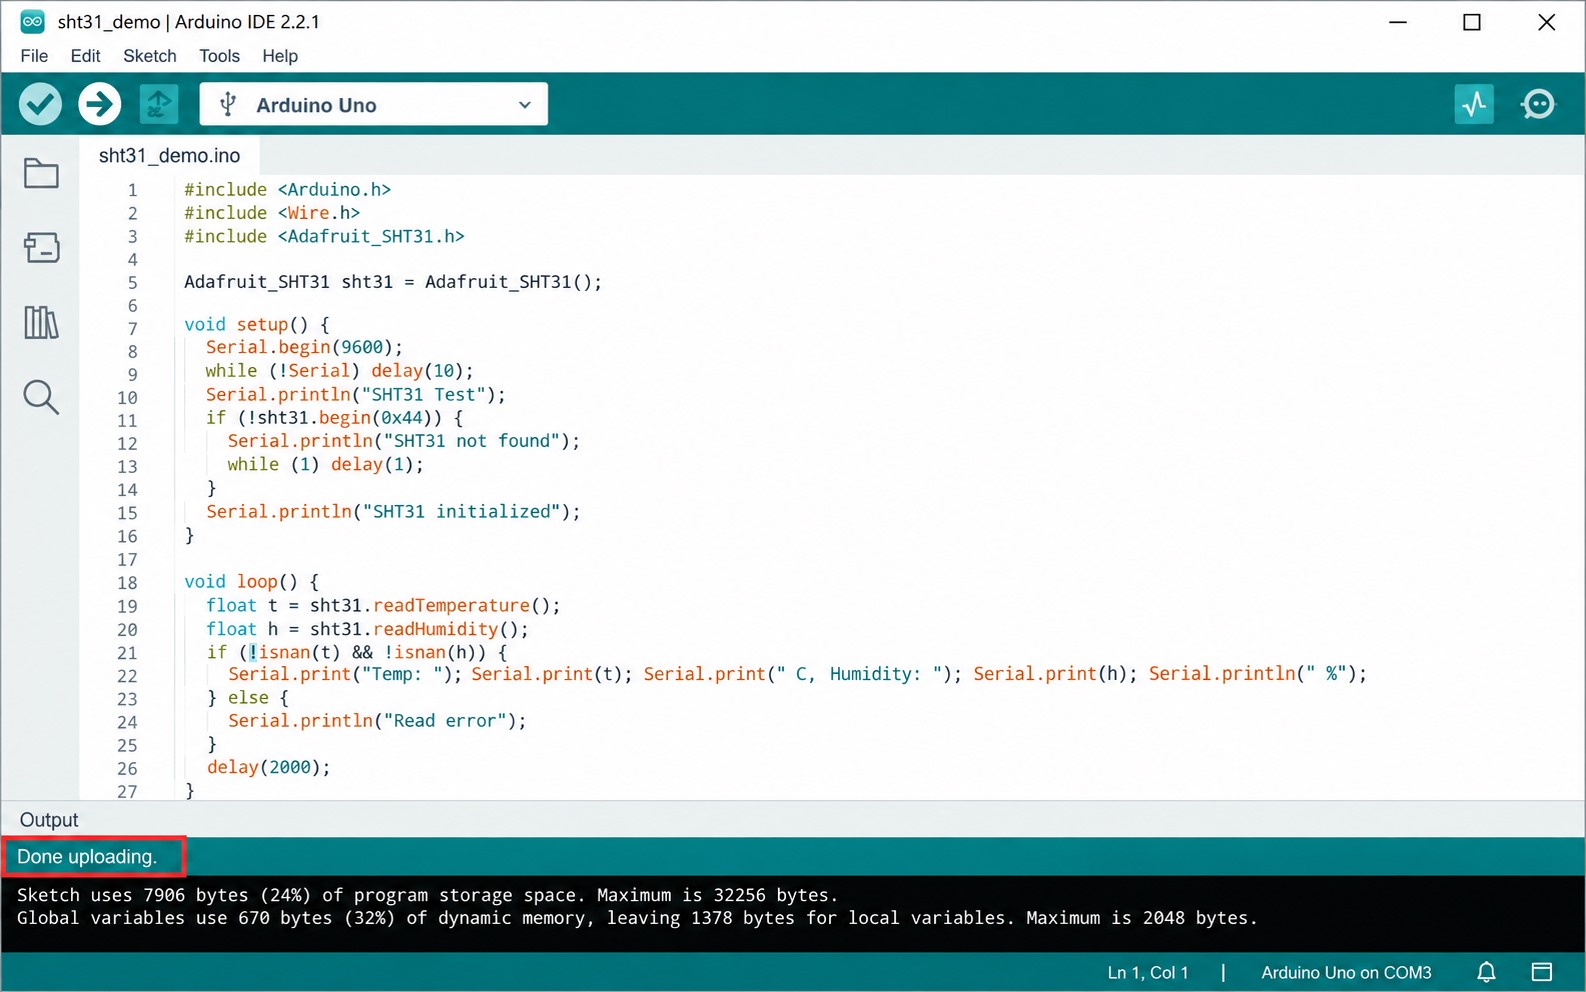
If uploading fails, recheck the selected port and board, use a data-capable USB cable, close any program holding the serial port, and retry. Do not change sensor wiring to solve an upload error unless it is shorting or loading the board.
7. How do you open Serial Monitor for SHT31?
Open Tools → Serial Monitor after the upload finishes. The diagnostic sketch prints a CSV header followed by records whose final field is ok, not_found or read_failed.
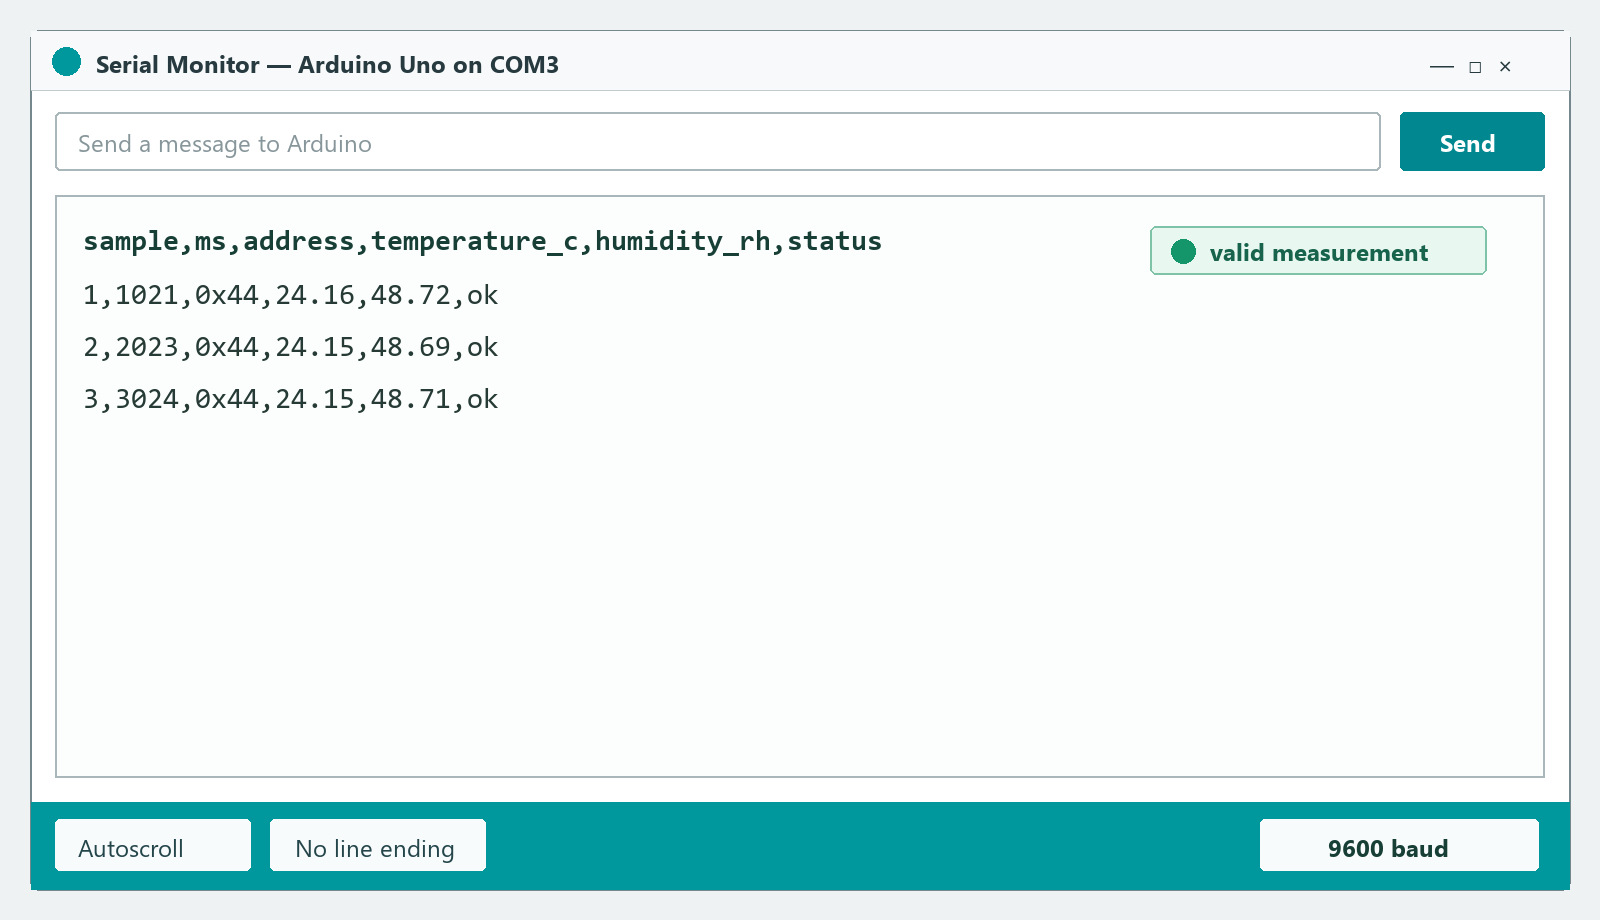
ok, and the baud-rate control is set to 9600.8. Why must Serial Monitor use 9600 baud?
Set Serial Monitor to 9600 baud because both sketches call Serial.begin(9600). Garbled text usually indicates a baud mismatch; a blank monitor can also require an Uno reset or a serial-port check.
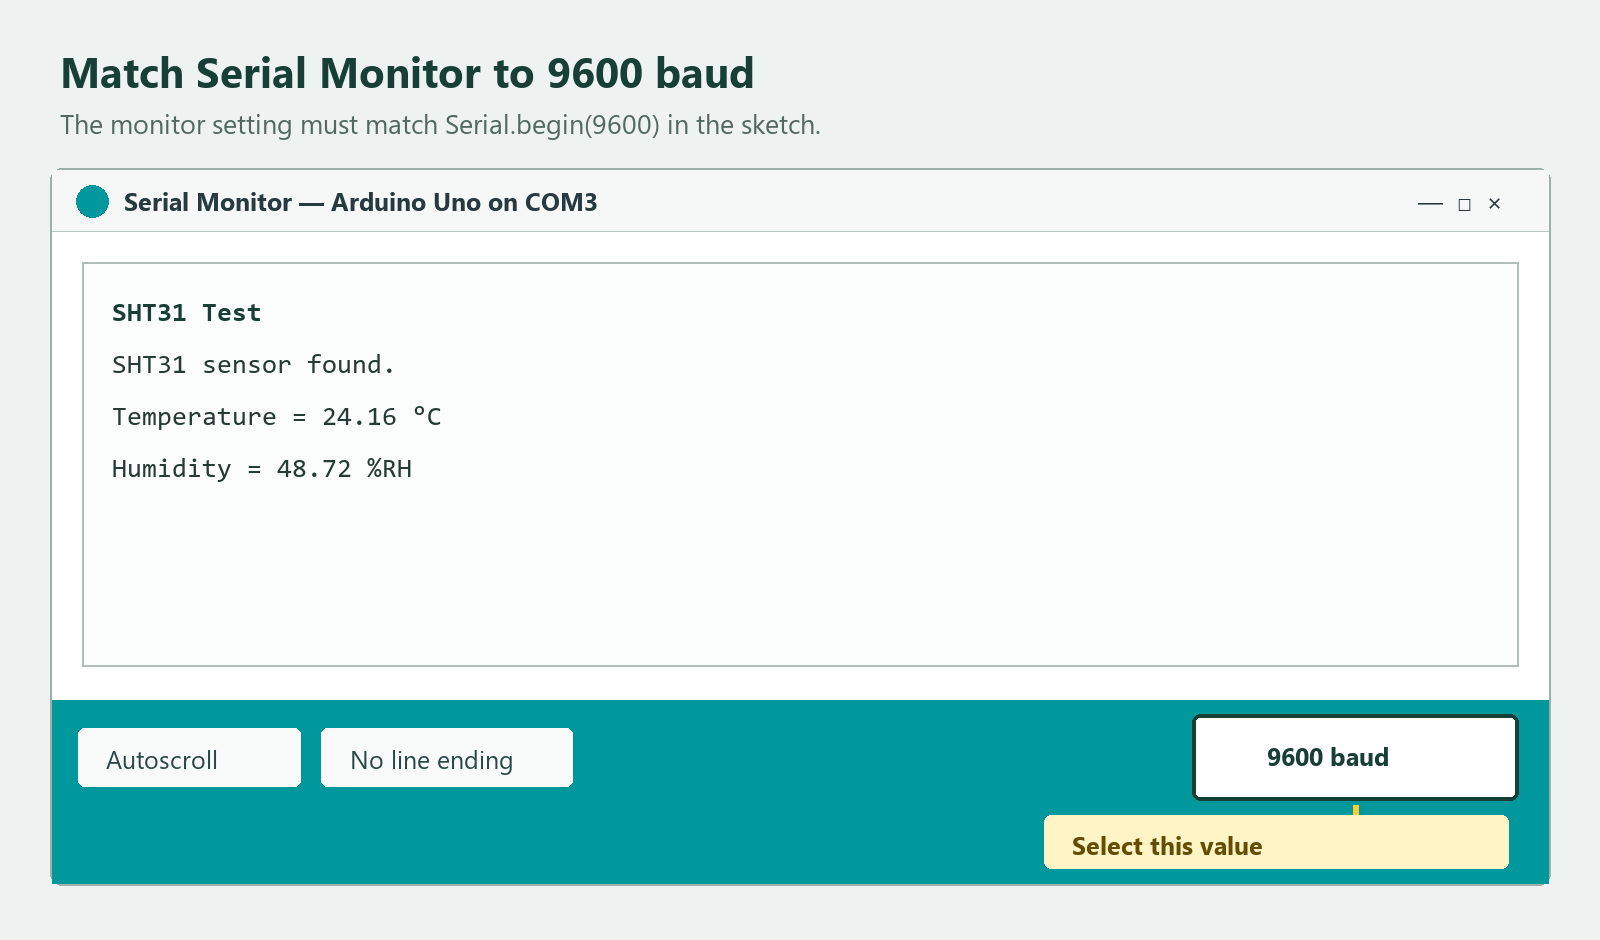
Serial.begin(9600). A mismatch can produce unreadable characters even when the sensor and wiring are working.9. How do you know whether SHT31 readings are valid?
An SHT31 reading is usable only when the current transaction returns finite temperature and relative-humidity values and the diagnostic status is ok. Reject NaN, not_found and read_failed records instead of carrying forward an older value.
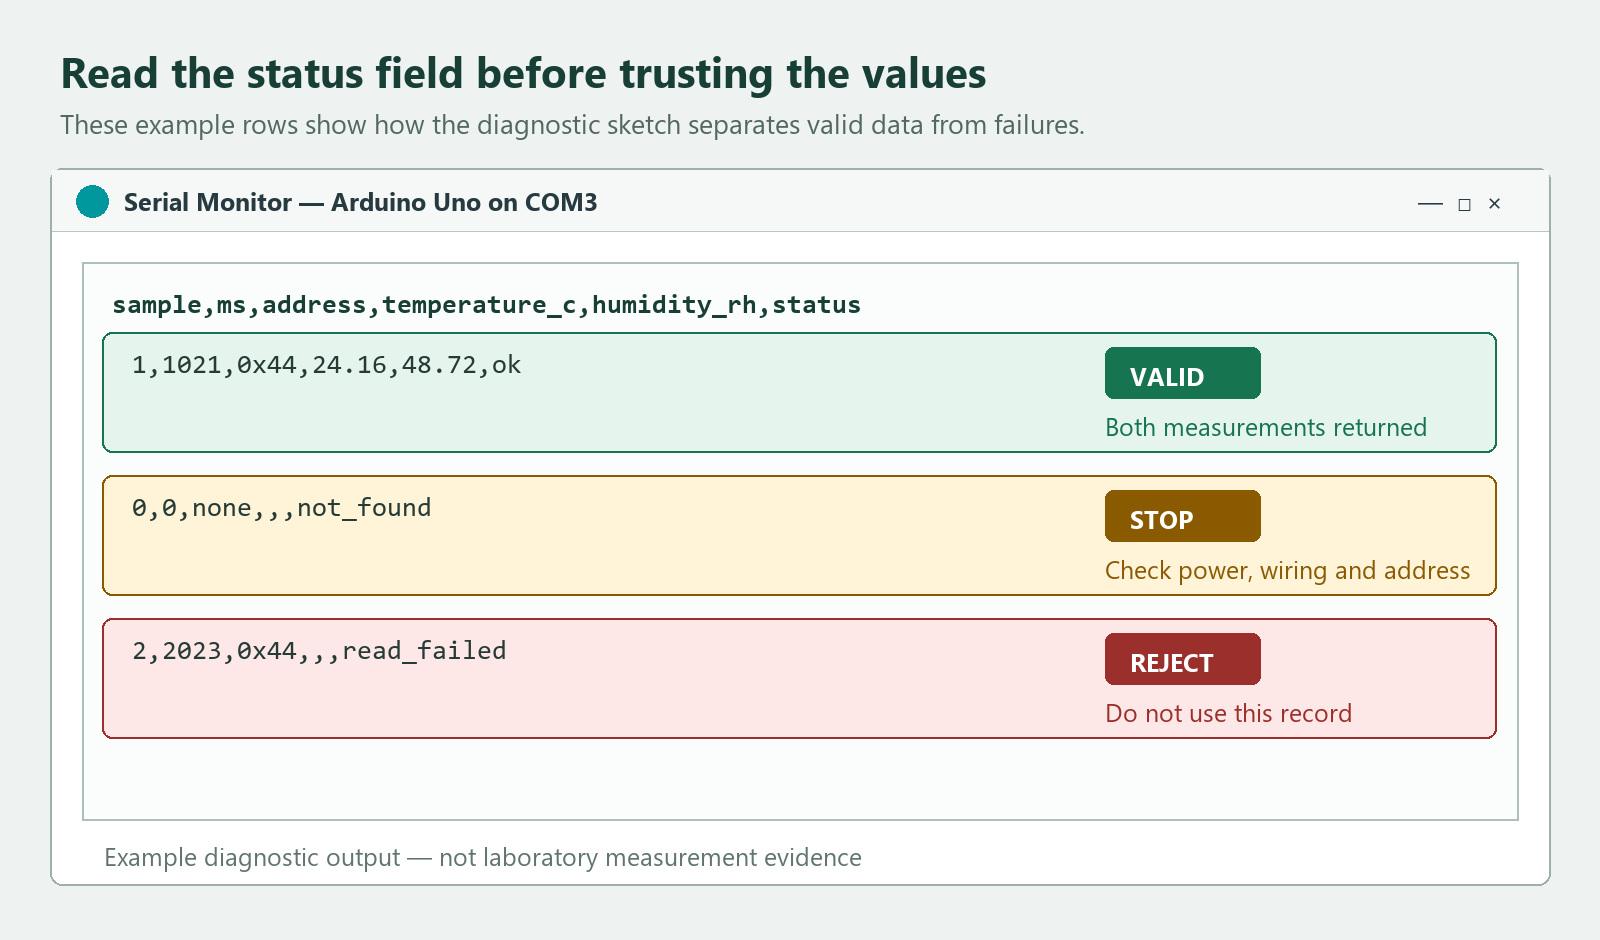
ok means both values were returned, not_found requires a power, wiring or address check, and read_failed means the record must not be used. The values shown are examples of the output format, not calibration evidence.sample,ms,address,temperature_c,humidity_rh,status
1,1021,0x44,24.16,48.72,ok
2,2023,0x44,24.15,48.69,okIf the SHT31 does not appear at 0x44, check 0x45 only when the module’s address configuration supports it. An I²C scan proves address acknowledgement; it does not prove a complete measurement transaction, correct CRC handling or sensor accuracy.
A usable bring-up record should update once per second, remain free of NaN or read_failed states, and settle toward a stable value when the sensor is left undisturbed. Plausible numbers alone are insufficient: compare the temperature and RH trend with the actual environment and investigate abrupt jumps, frozen values or repeated resets.
10. Why does SHT31 humidity fall during a warm-air test?
SHT31 temperature should rise and displayed relative humidity usually falls during a gentle warm-air check. Warming the sampled air raises its moisture capacity, so RH can fall even though the sensor has not removed water vapor.
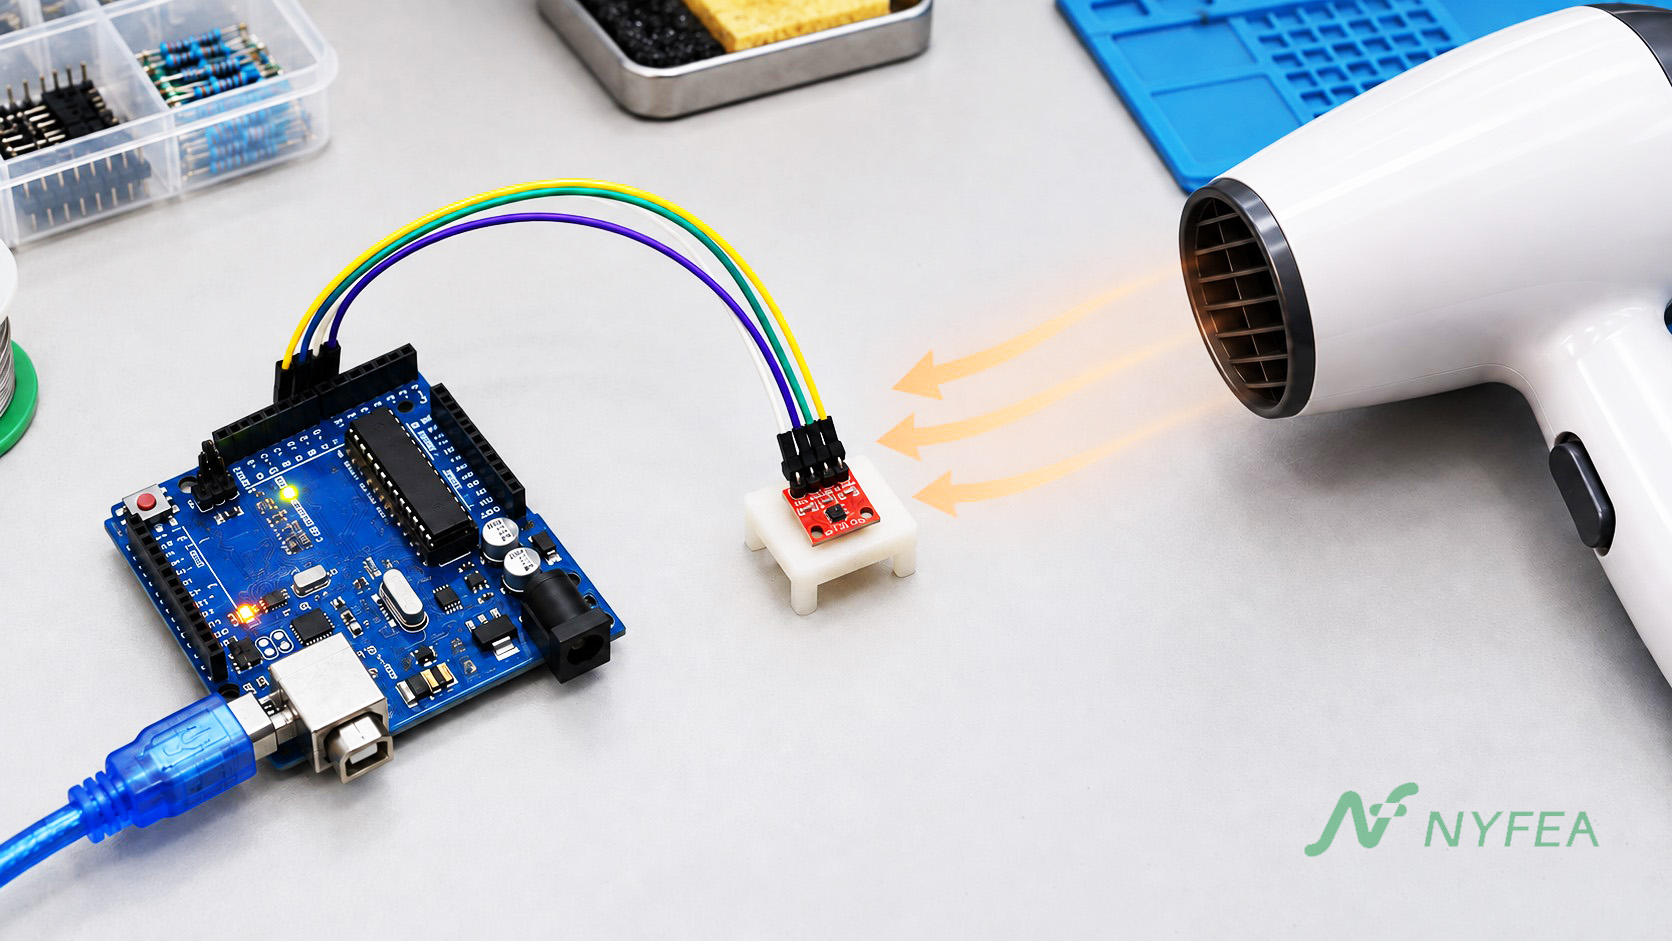
Use only mild, moving warm air from a safe distance and stop before the breakout or nearby plastics become hot. This is a qualitative response check, not a calibration, response-time or production-qualification test. A hair dryer also changes airflow and may introduce very dry or locally heated air, so its readings cannot be treated as controlled laboratory evidence.
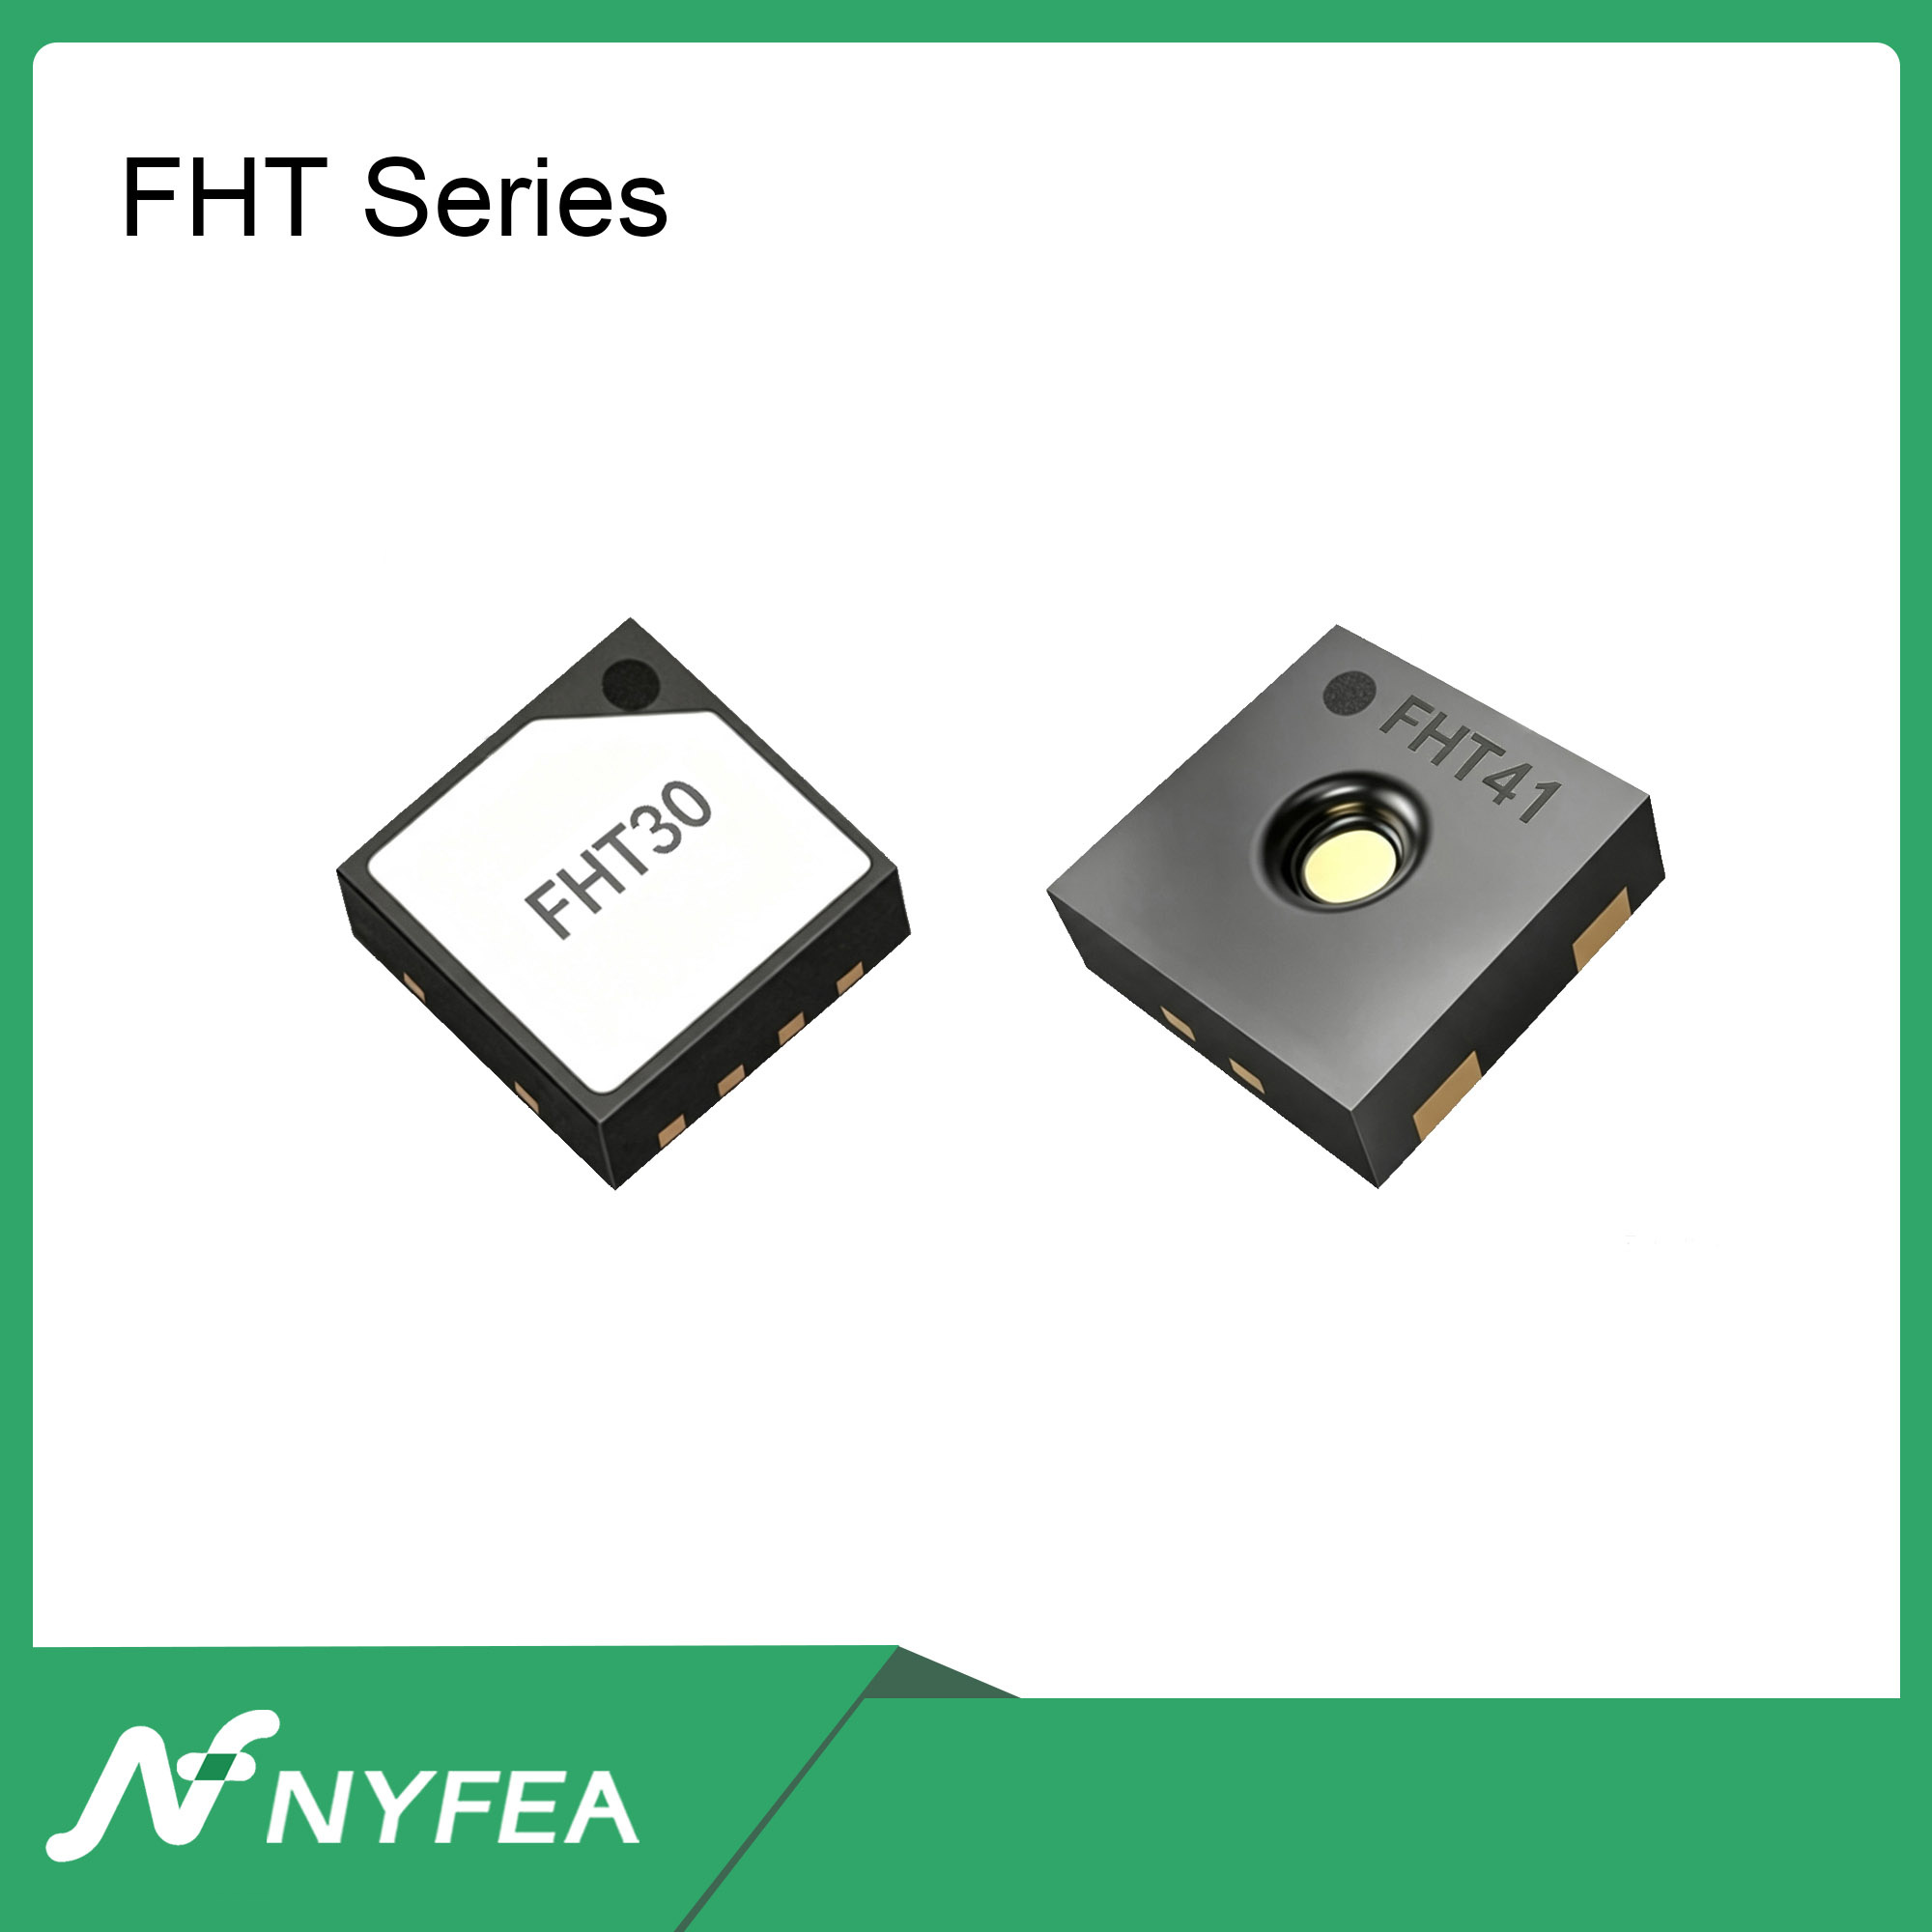
Can NYFEA FHT31 replace SHT31?
NYFEA FHT31 is a candidate for evaluation in SHT31-based designs, not an automatically approved replacement.
package, command, timing, CRC, error-recovery or production compatibility.
Validate the finished assembly against the project acceptance limits.
SHT31 Arduino FAQ
Which Arduino Uno pins connect to an SHT31 sensor?
Connect SDA to A4 and SCL to A5 on an Arduino Uno R3. Connect GND to GND, and connect VCC only to a supply voltage supported by the actual SHT31 breakout board.
What is the default SHT31 I²C address?
The usual SHT31 I²C address is 0x44. Some boards support 0x45 when the ADDR input is tied high; the ADDR input must not be left floating.
Why does Arduino report that the SHT31 sensor was not found?
Check the breakout supply, common ground, SDA and SCL orientation, pull-ups, and the configured 0x44 or 0x45 address. An upload success message confirms only that the sketch reached the Arduino, not that the SHT31 answered.
Why is the Arduino Serial Monitor output garbled?
Set Serial Monitor to 9600 baud so it matches Serial.begin(9600) in the sketch. A baud-rate mismatch can produce unreadable characters even when SHT31 communication is working.
Does a warm-air test prove SHT31 accuracy?
No. A gentle warm-air check can confirm the expected response direction: temperature rises and displayed relative humidity usually falls. It does not prove calibration, accuracy, response time, or production suitability.
Can NYFEA FHT31 replace SHT31 without validation?
No. NYFEA FHT31 is a candidate for evaluation in SHT31-based designs. Verify pinout, package, commands, timing, CRC behavior, error recovery, and finished-product measurement performance before approval.